| All you need to know about Carpenter's Square-17 |
|---|
 Previous | Index | Next Previous | Index | Next  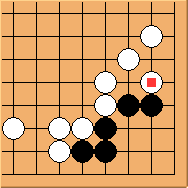 Diagram 17.1: White to play Black corner is under more pressure.
How can white make good use of 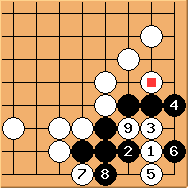 Diagram 17.2: Solution Unlike Diagram 16.2, because of 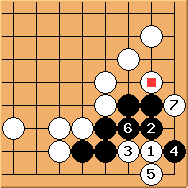 Diagram 17.3: Solution 2 Trying to emulate Diagram 16.7, black plays 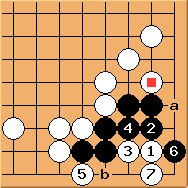 Diagram 17.4: Variation We've mentioned earlier that Conclusion: this is one of the simplest shapes we've covered so far. Black has no chance. Previous | Index | Next |
 ?
?  , leaving the key point
  to white.
After
to white.
After  the situation is so-called 'Golden Chicken Standing on One Leg' and black is dead.
 .
However, because of
.
However, because of  is possible now.
There is simply not enough eyespace in the corner. Black is dead too.
is possible now.
There is simply not enough eyespace in the corner. Black is dead too. directly to kill.
Or even simpler white can play
directly to kill.
Or even simpler white can play