| All you need to know about Carpenter's Square-31 |
|---|
 Previous | Index | Next Previous | Index | Next  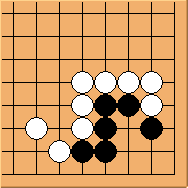 Diagram 31.1: White to play This shape is very similar to Shape 30. 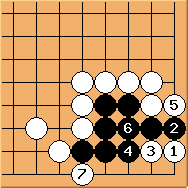 Diagram 31.2: Solution The solution is similar too. 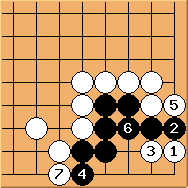 Diagram 31.3: Variation
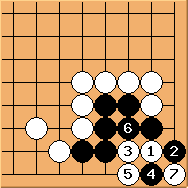 Diagram 31.4: White fails
To summarise: this is another simple problem.
The tesuji Previous | Index | Next |
 is still the key point and black corner suffers the same fate as in Shape 30.
 does not work either. White has longer liberty.
Note that white cannot play
does not work either. White has longer liberty.
Note that white cannot play  though.