| All you need to know about Carpenter's Square-28 |
|---|
 Previous | Index | Next Previous | Index | Next  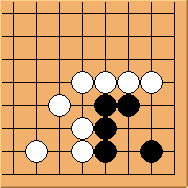 Diagram 28.1: White to play Can the external liberty make any difference? 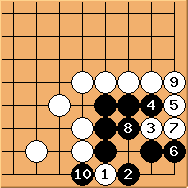 Diagram 28.2: White fails The external liberty is clearly helpful.
If white applies the solution of Shape 27, black is able to play 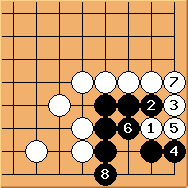 Diagram 28.3: White fails
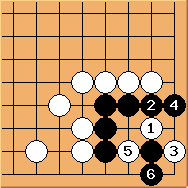 Diagram 28.4: White fails
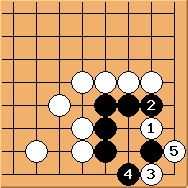 Diagram 28.5: Solution
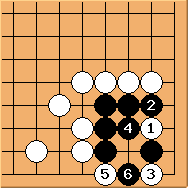 Diagram 28.6: Variation
Conclusion: Diagram 28.5 is the best for both sides. Previous | Index | Next |
 so the corner is alive.
White has to change strategy.
so the corner is alive.
White has to change strategy. is the key point. However,
  is incorrect.
 is again a calm move. Black is alive.
If
is again a calm move. Black is alive.
If  first, then a ko fight in inevitable.