| All you need to know about Carpenter's Square-27 |
|---|
 Previous | Index | Next Previous | Index | Next  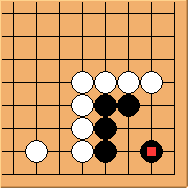 Diagram 27.1: White to play Can 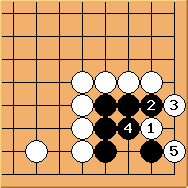 Diagram 27.2: White fails
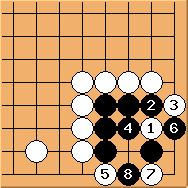 Diagram 27.3: White fails
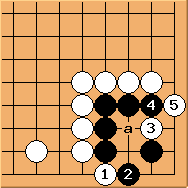 Diagram 27.4: Solution Making Conclusion: Diagram 27.4 is a simple and elegant solution. Previous | Index | Next |
 secure this corner?
 appears to be important, but
  can only start a ko here.
 exchange first is the correct order.
Then white can come back to the key point
exchange first is the correct order.
Then white can come back to the key point  and kill the corner - black cannot play 'a'.