| All you need to know about Carpenter's Square-2 |
|---|
 Previous | Index | Next Previous | Index | Next 
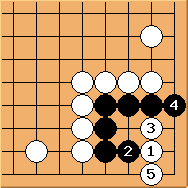
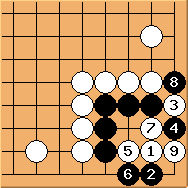
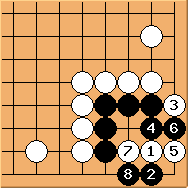
There are two more things to mention here: 1. If black group has one external liberty, the above sequence remains the same, although black has an alternative to (will cover this in Shape 8 later). (will cover this in Shape 8 later).2. Because of symmetry,  and and  work exactly the same. However, in real games, the shape is unlikely to be as clean as on a textbook.
So how to choose the correct side? Assume that black eventually wins the ko fight,
he would have captured
  and and  stones, leaving further yose to play on that side.
If the surrounding environment is not symmetric,
black can in principle choose the side with more valuable yose left (make sense?).
stones, leaving further yose to play on that side.
If the surrounding environment is not symmetric,
black can in principle choose the side with more valuable yose left (make sense?).Are there any variations? We will discuss a few:
Solution 1 (Diagram 2.2) is one of the two standard ways to start a ko fight in the Carpenter's Square. In Shape 3 we will discuss the other way.  Previous | Index | Next Previous | Index | Next  |
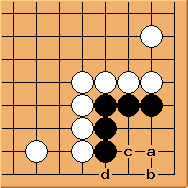
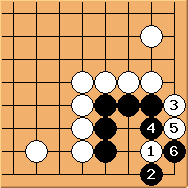
 is also the only move (explained later). The final outcome is a ko fight.