| All you need to know about Carpenter's Square-14 |
|---|
 Previous | Index | Next Previous | Index | Next  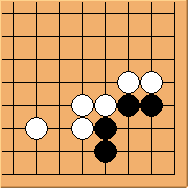 Diagram 14.1: White to play We now move on to shapes with the 4-4 points occupied by white. These are much weakened shapes. 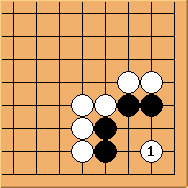 Diagram 14.2: Even weaker shape We will not discuss this even weaker shape as black is clearly dead. 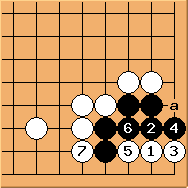 Diagram 14.3: Solution 1
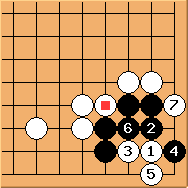 Diagram 14.4: Solution 2
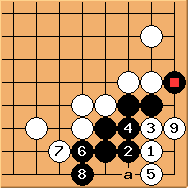 Diagram 14.5: Extra hane If black has the extra 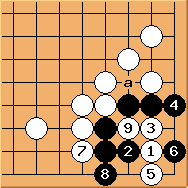 Diagram 14.6: Extra liberty Even if black has an extra liberty at 'a', white can continue to use Diagram 14.4.
In case black plays Conclusion: this corner shape is too weak to survive even with either of the two favorable conditions. Previous | Index | Next |
 is simple and effective. Black clearly has insufficient eyespace.
If
is simple and effective. Black clearly has insufficient eyespace.
If  plays 'a', white still replies at
  to win the capturing race.
  forces black to fill his own eyespace at
  so the whole corner is dead.
 stone, white can still use Diagram 14.4 to kill the corner.
This diagram shows how white would respond to
stone, white can still use Diagram 14.4 to kill the corner.
This diagram shows how white would respond to  from the other side.
 ,
white wins the capturing race by one liberty.
,
white wins the capturing race by one liberty.